10 月 . 05, 2024 15:00 Back to list
Guide to Properly Installing Oil Seals for Optimal Performance
Installing Oil Seals A Comprehensive Guide
Oil seals play a crucial role in various machinery and vehicles by preventing the leakage of oil and keeping contaminants at bay. Proper installation of these components is essential for ensuring the longevity and efficiency of the equipment. This article provides a detailed overview of the steps involved in installing oil seals effectively.
Understanding Oil Seals
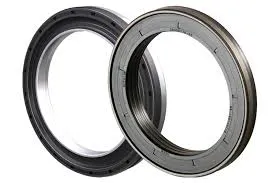
Before diving into the installation process, it's important to understand what oil seals are and their function. Oil seals, also known as lip seals or shaft seals, consist of a rubber or elastomeric material molded into various shapes. They fit snugly around rotating shafts to seal the area between the shaft and the housing, preventing oil leakage and dirt intrusion. Common applications include automotive engines, gearboxes, and industrial machinery.
Tools and Materials Needed
To ensure a smooth installation, gather the following tools and materials
1. Oil seals - Ensure you have the correct size and type for your application. 2. Sealant - Optional; some installations may benefit from a sealant. 3. Lubricant - Used to facilitate the installation process. 4. Pliers - For handling and positioning the seals. 5. Socket set or wrench - To remove any parts obstructing access to the seal area. 6. Ruler or caliper - To measure the shaft and housing for compatibility.
Steps for Installation
1. Preparation Start by cleaning the area around the seal socket to remove any dirt, old sealant, or debris. This ensures a proper fit and a clean surface for the new seal.
2. Removing the Old Seal If you're replacing an old seal, carefully remove it using pliers or a seal puller. Take care not to damage the sealing surface of the housing or the shaft.
installing oil seals

3. Inspecting Components Check the shaft and housing for any signs of wear or damage. Smooth out any rough areas to prevent future leaks. If the shaft is worn, it may require polishing or replacement.
4. Applying Lubricant Before installing the new oil seal, apply a thin layer of lubricant to the sealing lip and the area where it will rest. This helps ease installation and reduces the risk of damage to the seal during the process.
5. Installing the Seal Carefully place the oil seal into its designated location, ensuring it is oriented correctly. Some seals have a specific direction for the lip. Use even pressure to press it into place, avoiding any tilting or misalignment.
6. Securing the Seal Once in place, ensure it is seated evenly and flush with the housing surface. If necessary, gently tap around the outer edge with a soft mallet to secure it fully.
7. Reassembly Reattach any components or covers that were removed to access the seal area. Ensure everything is torqued to the manufacturer's specifications.
8. Testing After installation, run the machinery or vehicle to check for any leaks and ensure that the seal is functioning correctly.
Conclusion
Installing oil seals may seem straightforward, but proper techniques and attention to detail are paramount to avoid costly leaks and equipment failures. By following the outlined steps and using the right tools, you can effectively install oil seals, ensuring your machinery runs smoothly and efficiently.
Remember, when in doubt about specific applications, always consult the manufacturer's guidelines or seek professional assistance.