10 月 . 11, 2024 08:41 Back to list
installing oil seals
Installing Oil Seals A Comprehensive Guide
Oil seals play a crucial role in the smooth operation of machinery and engines. They prevent oil leakage and protect internal components from dirt, dust, and moisture, ensuring longevity and efficiency. Installing oil seals correctly is vital to avoid costly repairs and maintain optimal functionality. This article will guide you through the process of installing oil seals properly.
Understanding Oil Seals
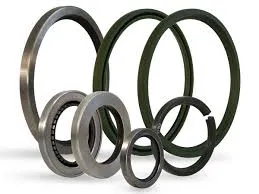
Oil seals, also known as shaft seals, are circular components made from rubber or pliable material, featuring a metal casing. They are designed to fit snugly around rotating shafts. The seal serves two primary purposes it retains lubricating oil inside the machinery while preventing external contaminants from entering.
Preparing for Installation
Before diving into the installation process, preparation is key. First, ensure that you have all the necessary tools at hand—this typically includes a seal driver, a clean cloth, and some lubricating oil. Familiarize yourself with the specific dimensions and specifications of the oil seal to ensure a proper fit. Always consult the manufacturer's guidelines for particular instructions related to the type of equipment you are working on.
Removing the Old Oil Seal
If you are replacing an old oil seal, use a suitable tool to carefully remove it without damaging the housing or components around it. It’s advisable to clean the area thoroughly to eliminate any debris or remnants of the old seal. Inspect the shaft for any signs of wear or damage, and address these issues before proceeding. Any imperfections on the shaft’s surface can lead to premature seal failure.
installing oil seals

Installing the New Oil Seal
1. Lubricate the Seal and Shaft Apply a thin layer of lubricating oil to the outer edge of the new oil seal and the shaft. This will facilitate a smooth installation and provide a seal during the initial operation.
2. Position the Seal Carefully align the oil seal with its housing. Ensuring it is straight and even will prevent misalignment, which can cause leaks.
3. Use a Seal Driver Place a seal driver over the oil seal and gently tap it into position. Ensure that the seal sits flush against the housing to create a proper seal.
4. Check for Damage After installation, inspect the seal for any visible damage. A correctly installed seal should be free of distortions and should not bulge outward.
5. Reassemble Components Once the seal is securely in place, reassemble any components that were removed during the process. Double-check that everything is fastened tightly.
Conclusion
Installing oil seals may seem daunting, but with the right knowledge and tools, it can be a straightforward task. Proper installation is essential for the efficient operation of machinery, extending its lifespan, and preventing costly repairs. Always adhere to best practices and manufacturer guidelines for the best results. With diligence and care, your newly installed oil seal will help keep your machinery running smoothly for years to come.