12 月 . 03, 2024 17:40 Back to list
installing oil seals
Installing Oil Seals A Comprehensive Guide
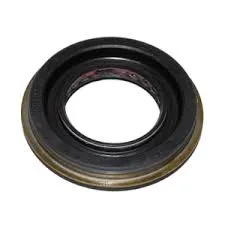
Oil seals, also known as shaft seals, are critical components in various mechanical systems. They play a vital role in preventing the escape of lubricants while also keeping contaminants out, thus ensuring the longevity and efficiency of machinery. The installation of oil seals may seem straightforward, but proper techniques are crucial for ensuring functionality and durability. This article will guide you through the essential steps for installing oil seals effectively.
Understanding Oil Seals
Before diving into installation, it’s essential to understand the types of oil seals available. Oil seals can be made of different materials such as rubber, silicone, or polyurethane, and they come in various designs, including single-lip and double-lip seals. Each type serves a specific purpose, and choosing the right seal for your application is paramount.
Tools and Materials Needed
To install oil seals properly, you’ll need a few tools and materials - New oil seal - Seal driver or a suitable piece of pipe - Clean cloths - Lubricant (such as oil or grease) - Hammer - Screwdriver or pry bar (in case you need to remove an old seal) - Safety goggles and gloves
Step-by-Step Installation Process
1. Preparation
Begin by ensuring that the working area is clean and free of debris. Put on safety goggles and gloves to protect yourself. Before installing a new oil seal, remove the old one. Use a screwdriver or pry bar to gently lift the edge of the seal. Take care not to damage the surrounding components.
2. Clean the Installation Area
Once the old seal is removed, clean the sealing surface thoroughly. Any dirt, grime, or old lubricant can lead to improper sealing and premature failure. A clean cloth will help wipe down the surface to ensure optimal adhesion of the new seal.
installing oil seals

3. Lubricate the New Seal
Before installation, it’s advisable to lubricate the lip of the new oil seal. A small amount of lubricant will help it slip into place more easily and create a better seal. Ensure that the lubricant used is compatible with the application and the oil seal material.
4. Installing the Seal
Align the oil seal with the housing or shaft where it will be installed. If you are using a seal driver, position it over the seal and tap it gently with a hammer, ensuring even pressure around the seal. If a seal driver is not available, you can use a piece of pipe that matches the diameter of the seal. Avoid hammering directly on the seal’s lip, as this can damage it and compromise its sealing ability.
5. Check for Proper Installation
After installation, check that the seal is seated evenly in the housing without any gaps. A properly installed oil seal should be flush with the surrounding surface. If the seal appears misaligned or protruding, it may need to be removed and reinstalled.
6. Test the Installation
Once installed, it’s essential to test the mechanism to check for leaks. Apply the necessary power to the system and observe for any signs of oil leakage. If all is well, the seal has been successfully installed.
Conclusion
Proper installation of oil seals is crucial for maintaining the efficiency and functionality of any machinery using lubricant. By following the steps outlined above, you can ensure that your oil seals are installed correctly, preventing leaks and extending the life of your equipment. Always remember to use the right tools, follow best practices, and perform regular maintenance checks to keep your systems running smoothly.