9 月 . 21, 2024 15:00 Back to list
installing valve cover gasket
Installing a Valve Cover Gasket A Step-by-Step Guide
Installing a valve cover gasket is an essential maintenance task for any car owner. This gasket plays a crucial role in keeping your engine free of oil leaks, which can lead to more severe engine issues if left unaddressed. If you’re experiencing oil leaks around the valve cover or noticing oil on your spark plugs, it may be time to replace the valve cover gasket. Here's a detailed guide on how to install a valve cover gasket properly.
Tools and Materials Needed
Before starting, ensure you have the following tools and materials - New valve cover gasket - Torque wrench - Socket set (including extension) - Screwdrivers (flathead and Phillips) - Clean rags or paper towels - Engine degreaser - RTV silicone (if required by your vehicle’s manufacturer) - Safety goggles and gloves
Step 1 Prepare the Vehicle
1. Park Safely Begin by parking your vehicle on a flat surface and engaging the parking brake. 2. Disconnect the Battery Safety is paramount; disconnect the negative terminal of the battery to prevent any electrical issues. 3. Remove Engine Covers If your vehicle has any plastic engine covers or components obstructing access to the valve cover, remove them first.
Step 2 Access the Valve Cover
1. Remove Ignition Components If applicable, take out any ignition coils or spark plug wires that might be in the way of the valve cover. Labeling these components can help during reassembly. 2. Unbolt the Valve Cover Use your socket set to remove the bolts securing the valve cover. Keep these bolts organized; they often vary in length and location.
Step 3 Remove the Old Gasket
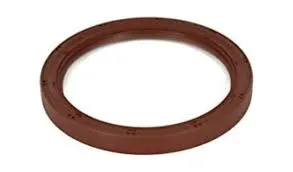
installing valve cover gasket

1. Lift Off the Valve Cover Carefully lift the valve cover away from the engine. Be cautious not to damage any surrounding components. 2. Clean the Surfaces Inspect the old gasket for any remnants that may have stuck to the valve cover or the engine. Use a clean rag and engine degreaser to thoroughly clean both surfaces. Removing old gasket material is critical to ensuring a proper seal with the new gasket.
Step 4 Install the New Gasket
1. Position the New Gasket Place the new valve cover gasket onto the clean valve cover. Ensure it is seated evenly in the grooves. If your vehicle’s manual calls for it, apply a thin bead of RTV silicone at the corners for extra sealing. 2. Reattach the Valve Cover Carefully place the valve cover back onto the engine, making sure not to shift the gasket out of place.
Step 5 Secure and Reassemble
1. Tighten the Bolts Following the manufacturer’s specifications, tighten the valve cover bolts in a crisscross pattern to ensure even pressure. Use a torque wrench to tighten the bolts to the recommended torque setting. 2. Reinstall Components Reattach any ignition components, including coils and wires, making sure everything is connected correctly. 3. Replace Engine Covers If any engine covers were removed initially, put them back in place.
Step 6 Final Checks
1. Reconnect the Battery Reconnect the negative battery terminal. 2. Check for Leaks Start the engine and let it run for a few minutes. Check under the vehicle for any signs of oil leaks around the valve cover. 3. Test Drive Take your car for a short drive and observe for any leaks or issues.
Conclusion
Replacing a valve cover gasket is a manageable task for most DIY enthusiasts. By following these steps and ensuring thorough cleaning and proper torque specifications, you can prevent leaks and maintain your engine's performance. Regular maintenance not only prolongs the life of your engine but also saves you money in costly repairs down the line. Happy wrenching!