2 月 . 12, 2025 09:53 Back to list
replace oil valve cover gasket
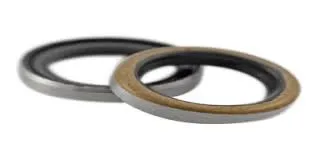
Replacing an oil valve cover gasket may seem like a straightforward task, yet it holds significant weight in maintaining the overall health and performance of your vehicle's engine. With years of experience in automotive care, we've seen how a leaking gasket can disrupt your vehicle's performance, leading to unnecessary expenses down the road. This article will guide you through the process with expertise, ensuring the authority and trustworthiness you seek when tackling vehicle maintenance or repair.
2. Preparation for Replacement Start by parking your vehicle on a flat surface and allow the engine to cool. Disconnect the battery to avoid any electrical shorts. Ensure you have ample lighting and access to the valve cover. 3. Removal of the Valve Cover Detach any components obstructing access to the valve cover, such as spark plug wires or other connected hoses. Carefully unscrew the bolts fastening the cover, using a socket wrench, and gently lift the cover to prevent damage. 4. Cleaning the Mating Surface Once the valve cover is off, examine the gasket. Utilize a gasket scraper to remove old gasket material from both the cover and the cylinder head. Clean the surfaces thoroughly using an engine degreaser to ensure a tight and leak-free seal with the new gasket. 5. Installing the New Gasket Position the new gasket onto the valve cover, ensuring all edges align correctly. It's advisable to apply a small amount of gasket sealer to improve adhesion and create an airtight seal. 6. Reinstallation and Torque Specification Place the valve cover back onto the engine and hand-tighten the bolts initially. Use a torque wrench to finish tightening the bolts to the manufacturer's specifications. Be cautious not to over-tighten, which can warp the cover or damage the gasket. 7. Reassemble and Inspect Reconnect any removed components, reconnect the battery, and start the engine. Observe the replaced gasket for any initial leaks and ensure everything operates smoothly. Trust in your equipment and take time to conduct this repair with precision. Improper installation or using subpar materials can lead to premature gasket failure, further emphasizing the importance of using quality products and adhering to professional advice. This guide provides a solid grounding for performing a successful valve cover gasket replacement, ensuring that your vehicle runs efficiently and reliably for thousands of miles.

2. Preparation for Replacement Start by parking your vehicle on a flat surface and allow the engine to cool. Disconnect the battery to avoid any electrical shorts. Ensure you have ample lighting and access to the valve cover. 3. Removal of the Valve Cover Detach any components obstructing access to the valve cover, such as spark plug wires or other connected hoses. Carefully unscrew the bolts fastening the cover, using a socket wrench, and gently lift the cover to prevent damage. 4. Cleaning the Mating Surface Once the valve cover is off, examine the gasket. Utilize a gasket scraper to remove old gasket material from both the cover and the cylinder head. Clean the surfaces thoroughly using an engine degreaser to ensure a tight and leak-free seal with the new gasket. 5. Installing the New Gasket Position the new gasket onto the valve cover, ensuring all edges align correctly. It's advisable to apply a small amount of gasket sealer to improve adhesion and create an airtight seal. 6. Reinstallation and Torque Specification Place the valve cover back onto the engine and hand-tighten the bolts initially. Use a torque wrench to finish tightening the bolts to the manufacturer's specifications. Be cautious not to over-tighten, which can warp the cover or damage the gasket. 7. Reassemble and Inspect Reconnect any removed components, reconnect the battery, and start the engine. Observe the replaced gasket for any initial leaks and ensure everything operates smoothly. Trust in your equipment and take time to conduct this repair with precision. Improper installation or using subpar materials can lead to premature gasket failure, further emphasizing the importance of using quality products and adhering to professional advice. This guide provides a solid grounding for performing a successful valve cover gasket replacement, ensuring that your vehicle runs efficiently and reliably for thousands of miles.